In this post I’m not going to talk about containers technology and differences between Docker and Virtual Machines I think that there is a lot of documentation about that.
I’m going to try to use informal/practice language to talk abot but because I’m not friend of theory and I prefer understanding the concepts and put them in practice. This post is the first one of the serie titled “Docker in practice for dummies” so if you already know Docker, it’s not going to be interesting for you, sorry…
Key Concepts: images and containers
When we talk about Docker we say that we have “images” and “container”. What does it mean? It’s simple, think about real life: an engineering team creates a design for an specific model of a car. The design is sent to a factory to produce many units of that car and sell it. All the cars produced from the same version of that design will (should) be identical. Later, the engineering team can introduce some changes in the design generating a new version. Cars produced from this new version are going to be identical but are going to be different from the initial one.
So, applying it to Docker concepts, the image is the design made by the engineers and the real cars produced in the factory are the containers.
It would like so much the definition is given by Docker team, so I’m copying it from its official documentation:
- Image: an image is an executable package that includes everything needed to run an application–the code, a runtime, libraries, environment variables, and configuration files.
- Container: a container is a runtime instance of an image–what the image becomes in memory when executed
Till now we know that we have images and containers. You are building a great images and maybe you wonder: how can we share our images? Can we use images from other users? The component to provide this functionality is called “Registry”. You can pull images from a registry, creating new images and publishing it to the registry.
Comming back to the cars example, the way to share the images between the engineering team and the factory would be the registry. Engineering team publishes versions of the design to the registry and the factory gets those designs from the registry.
OK, show me how it works
We’re going to deploy a Nginx server using Docker. I’m not going to explain how to install Docker because I think it’s explained very well in its official page
The first step is getting the official Nginx image. In order to do this, we’re going to search in the Docker Hub or Docker Store the offical image.
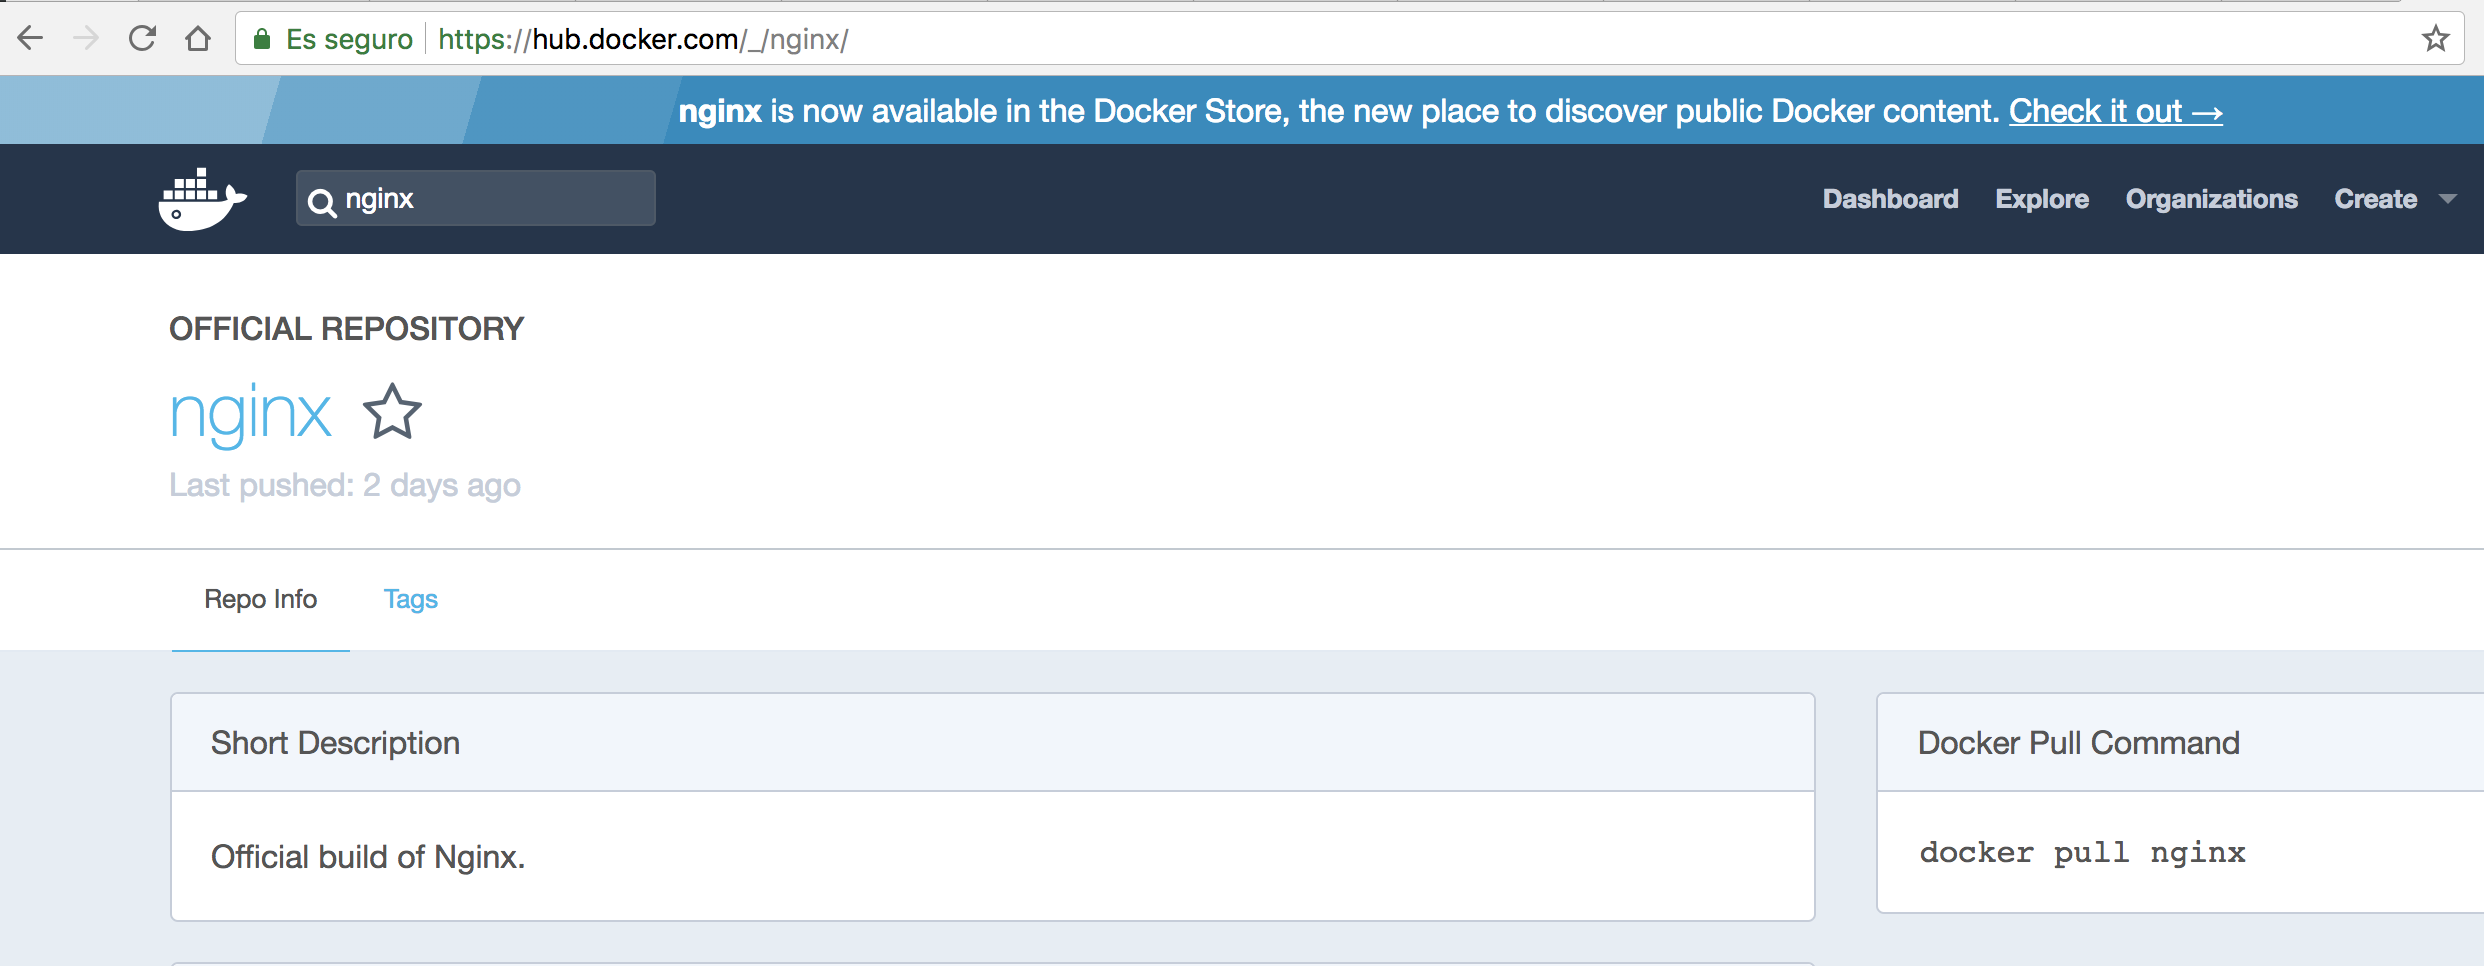
In this page, we find documentation about the image and how to use it. The command to download the latest version is:
docker pull nginx
But, we’re going to use the “alpine” one (we’ll talk about “alpine” means in other posts), so the command we have to execute is:
docker pull nginx:alpine
If you execute this command you’ll see something like that:
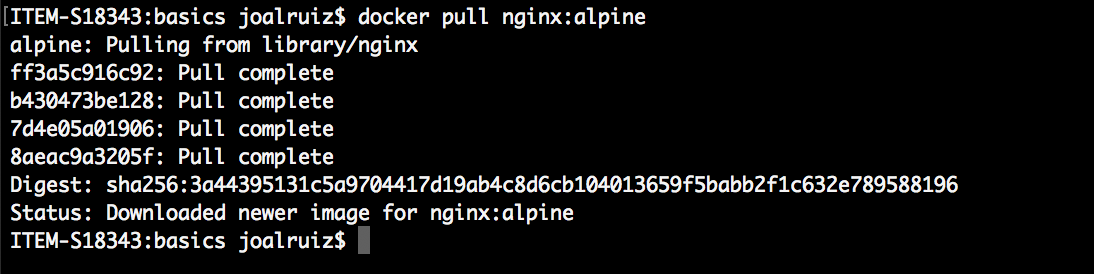
Probably you’re wondering what those identifiers mean…we’ll see in next posts, don’t worry now about that. The important key here is that you understand than you have “downloaded” a Nginx image and you can generate containers from it.
You can check what images you have in your computer executing the command:
docker images
The result will be something like that:
Remenber that the image is just a template, it’s not an execution unit then, Let’s go to get up and running our Nginx. Execute the following command:
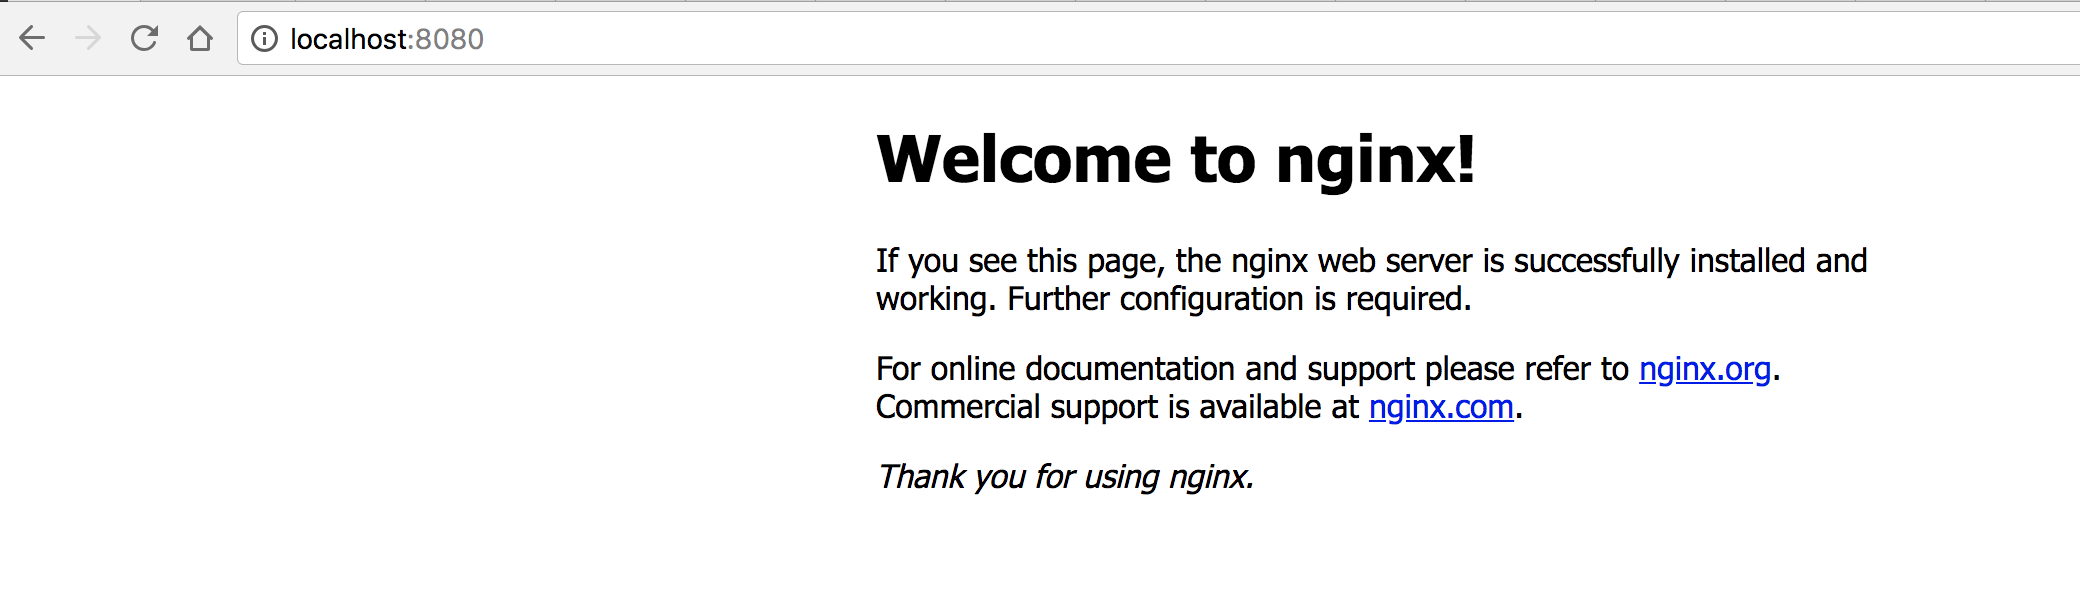
docker run -d --name my-first-docker-nginx -p 8080:80 nginx:alpine
In this command you’re saying to Docker that it’s to run a container named “my-first-docker-nginx” from the image “nginx:alpine” and it’s to allow access to port 8080 from outside. We’ll go in details about this command in next posts.
The result will be something like that:

If you open your browser and go to http://localhost:8080 you’ll get the welcome page:
It’s great! Our first container! But…you can do the same installing Nginx locally, don’t you? What about if we create an additional Nginx? Just do it:

Open a new tab in your browser and go to http://localhost:8081:
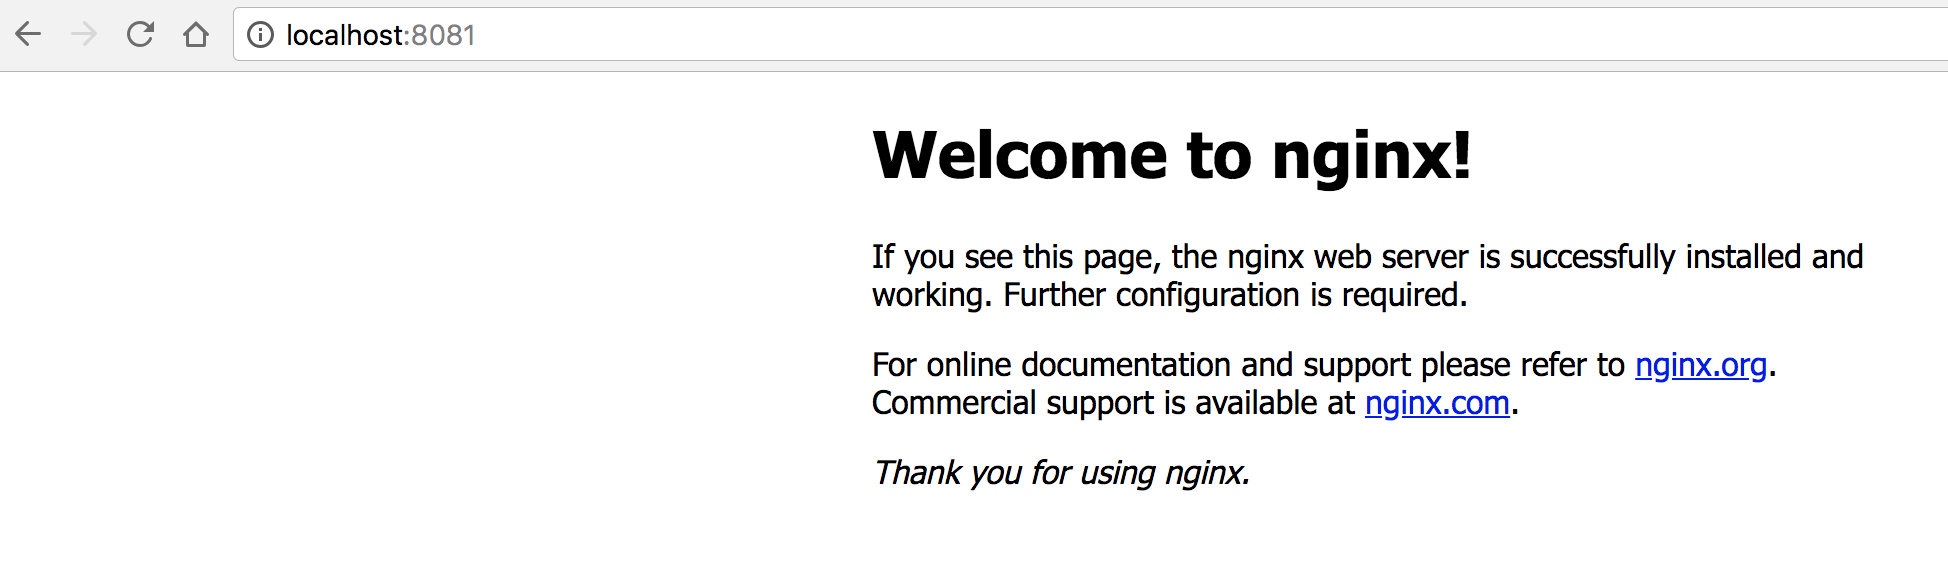
In this momment we have two Ngnix running in our compute as they are different and isolated machines, and both are identical. You can check what containers are running executing the command:

How can you stop a container? Simple, just say “stop” to the container you want to stop, for instance the second one. Execute docker stop my-second-docker-nginx and check it executing again
docker ps:

It’s important to understand that a container is stoped but it’s not removed. You can check which containers are running and which are stopped executing docker ps -a:

You are right. If you want to get your container up and running again, you just have to say it “start”:

By finishing this post, we need to learn how to remove containers. By default, it’s not possible to remove running containers some we are going to stop before removing. As we saw before, we’re saying “stop” to them:

TIP: You can stop all the containers running executing the command
docker stop $(docker ps -q --filter status=running)
Now, we can remove them using the command docker rm:

TIP: You can remove all the containers running executing the command
docker rm $(docker ps -a -q)
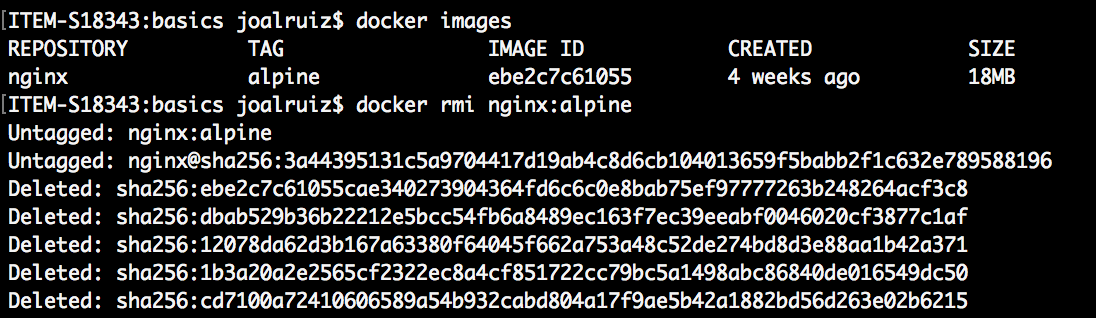
And what about the images? Do you want to remove the Nginx offical image from your computer? Ok, let’s execute docker rmi:
Summarizing
In this post, you’ve learnt:
- A image is a “template” used by generating identical containers
- Basics commands:
- Get an image:
docker pull <image> - List images:
docker images - Generate a container from a image:
docker run ... - List containers running:
docker ps - List conatiners in any state:
docker ps -a - Stop containers:
docker stop <list of containers> - Start containers:
docker start <list of containers> - Remove containers:
docker rm <list of containers> - Remove images:
docker rmi <list of images>
- Get an image:
I hope you’ve liked this post. In next posts we’ll talk about Docker deeply.
)