In the previous post we saw a starting point to work with Docker. We learnt how to pull an image and run it.
In this post we are going to explain more in detail the concept of images.
Docker Hub and Repositories: introduction
Before speaking about images, how they can be built and so on, maybe you’re wondering where the images “live”. If you remember the previous post, we “built” a containerized Nginx Server and the first step we did was “download” the official image
executing docker pull nginx:alpine. Magically, the image was downloaded from somewhere over the rainbow where the images live…
When you say “pull this image” to Docker without saying anymore else, Docker is going to get the image from Docker Hub.
Docker Hub? What is Docker Hub? If you look at in the official page, the definition is:

Awesome! For a better understanding, a “practical” definition about Docker Hub could be “a site where many docker images are uploaded and where you can upload your own images to share them”. It’s like the Gitlab of docker images. There is also a store (Docker Store), introduced in DockerCon 2016, more oriented to companies. If you want to read more about that, I recommend you this article
Comming back to Docker Hub, companies put there their official images of their software but there are also custom images that you can pull from it.
You can find images in Docker Hub using the web application or executing the command docker search <image>. For instance:
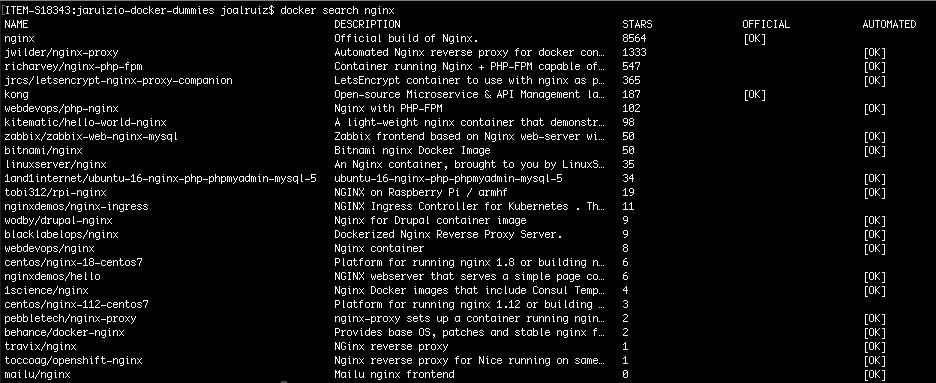
The result shows the list of images associated with a nginx server and you can also check wether the image is an official one or not.
Our first Docker repository
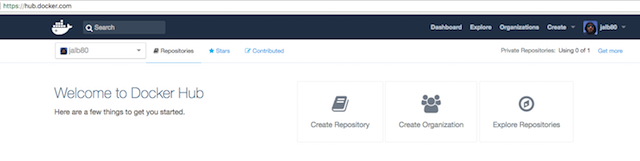
I’m not going to write about how to register in it because I think it’s very easy. The URL associated to Docker Hub is https://hub.docker.com/. Once you registered, you’ll see the dashboard and an option is “Create a Repository”:
So, what is a repository? A repository is a bucket of images, that means, a place where you publish your images and theirs different versions. Let’s create one to see clearly:
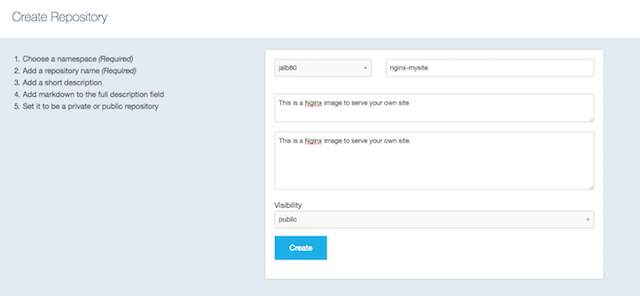
And if you click on “create” button to create it:
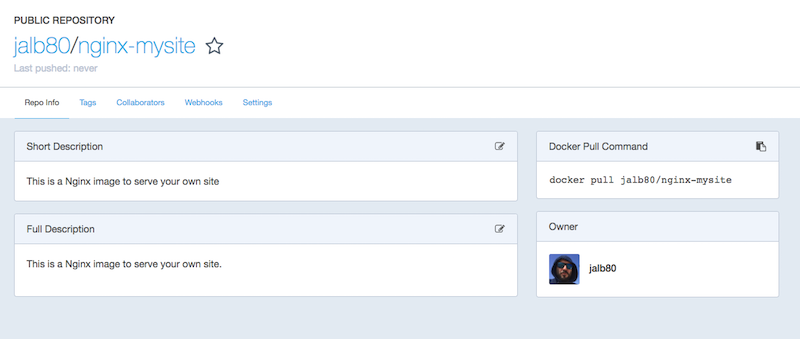
We’ve created a repository to share our Nginx images but we haven’t any image yet. Later on in this post, we’ll come back to our repo but we need to create our own image to publish it and share it. Now, we’re going to talk about images
Images and Dockerfile
In the previous post we talked about images and containers. In a practical way of speaking, an image is a kind of template from you can generate identical executable artifacts called containers. But we haven’t said anything about how images can be created…
There are several ways to create Docker images but I’m going to start with the “Dockerfile” way.
What are dockerfiles?
A Dockerfile is a text file used to describe the steps to build a Docker image.
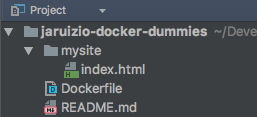
Let’s create our first Dockerfile! Remember that we are building an image to publish our website, you we need some personal website.
I’ve created a repo in Github to be used in these post about Docker. Each branch will be used in a concrete post. By this post, I’ve created the branch called “nginx-mysite”, containing a basic website (just an index.html) and a Dockerfile. We don’t need anymore to introduce dockerfiles:
If you open the Dockerfile file, you’ll see just three commands:
# This is a basic Dockerfile to expose your website using Nginx
# A Dockerfile must start with a FROM sentence. In this case, we use NGINX:ALPINE as a base
FROM nginx:alpine

# Next step is copying our website into the folder where nginx serve the contents
COPY mysite /usr/share/nginx/html

# This is necessary in order to stay Nginx in the foreground (from the official doc about using Nginx Docker image)
CMD ["nginx", "-g", "daemon off;"]
This is a Dockerfile. Summarizing, we’re saying to Docker the necessary steps to build our image:
1) Take the Nginx Alpine image as a base image 2) Copy the static files from our website to the folder where Nginx expose the static files 3) Execute a command to stay Nginx in the foreground
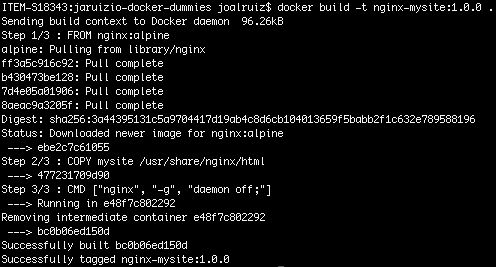
That’s all. But, how do you transform it to an image? You just need to say “build the image” to Docker:
docker build -t nginx-mysite:1.0.0 .
In this command, we also say “tag the image as nginx-mysite:1.0.0” to Docker. And the result should be similar like this picture:
If you execute docker images you’ll see:

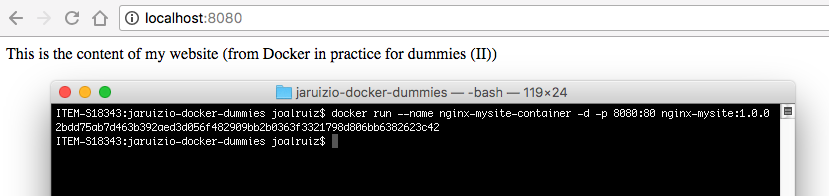
And now, you can run your image and generate and contaniner to serve your website:
docker run --name nginx-mysite-container -d -p 8080:80 nginx-mysite:1.0.0
Open http://localhost:8080 in your browser:
For the moment, I think this is enough to understand the concept of Dockerfile. In this post we don’t care about best practices to write dockerfiles because we’ll see it in detail in a specifiq post
Images and layers
Ok, we have already our website up and running and we can generate as many identical containers of our website as we want, but you must have a lot of questions about images.
The first question could be “why have I two images if I’ve only created one?”. If you execute
docker images -a
Docker lists three images:
- nginx,
- nginx-mysite
- <none>
Why the hell is that? Take a look to the following image associating the steps performed in the construction and the ids of the images you have:
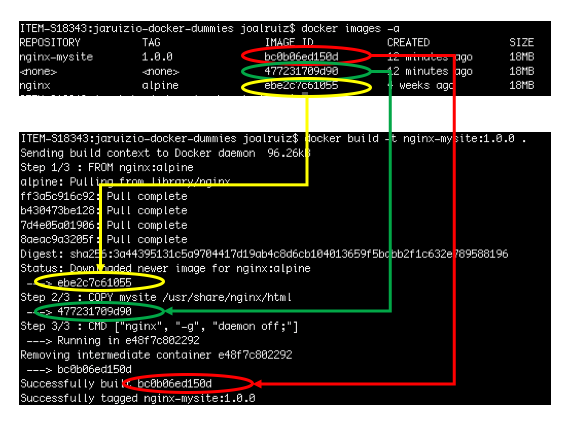
When Docker is building the image, each step of the Dockerfile is a “layer”, that is, something added, modified or removed from the previous layer. Technically, this modification over the previous layer is associated to a file, so an image is the union of several layers/files.
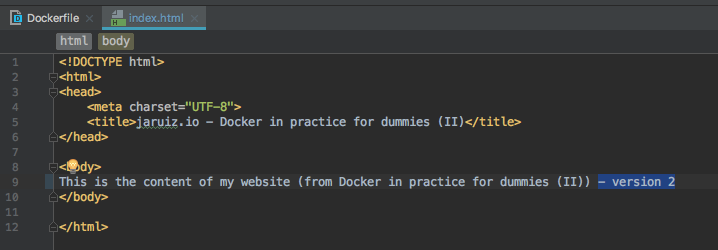
We’re going to modify our website in order to explain it better:
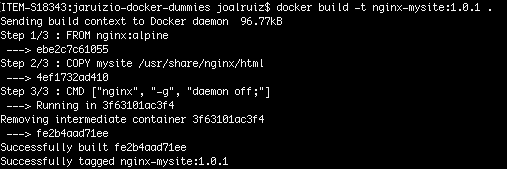
And now, we’re going to create a new image executing
docker build -t nginx-mysite:1.0.1 .
and the result should be something like this:
If we execute again the command docker images -a we can analyse in detail what it happened.
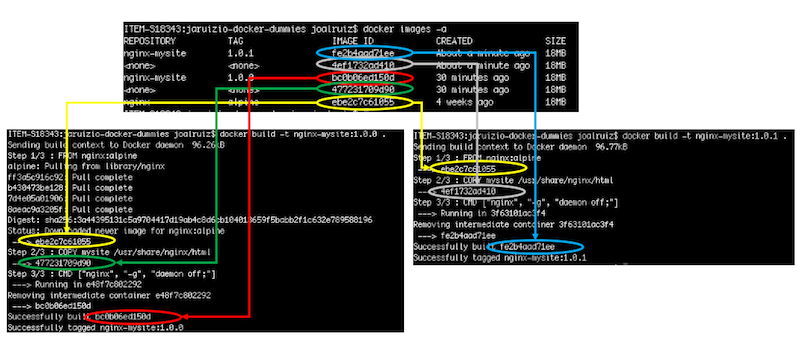
In this case, Docker hasn’t to download the Ngnix image because it downloaded before and takes the image with id eb2c7c61055. Then, taking this image as a base, Docker has created two new images.
Why does Docker do that? Docker manages images as a hierarchy. In this case, the hierarchy is the following:
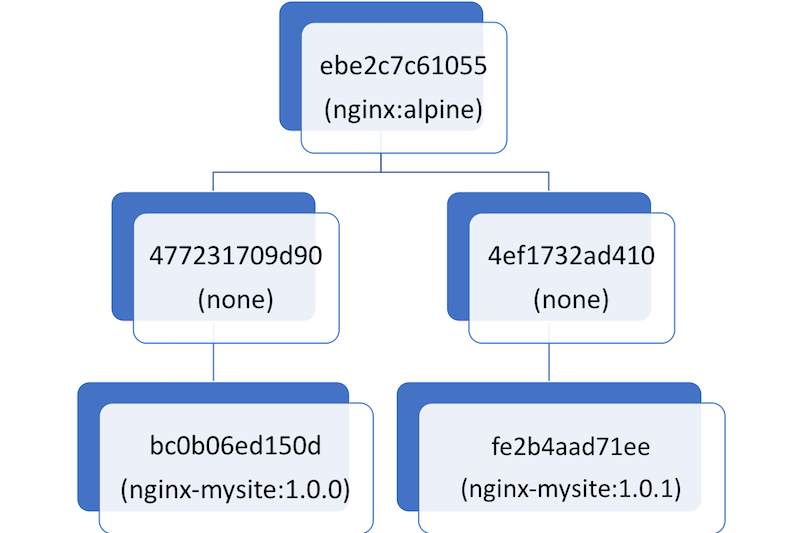
Images can have relationships with any other image, including images in different repositories with different owners. Each node in the hierachy is called as a layer. A layer is generated from each command in the Dockerfile. If two Dockerfiles has the same “FROM” like in this example, the same layer is shared by both images, then the size of the image depends directly on the layer structure.
Docker re-uses images to build new ones on top of them and it gets saving a lot of disk space. You can show all the layers associated to an image by executing the command docker history <image>:
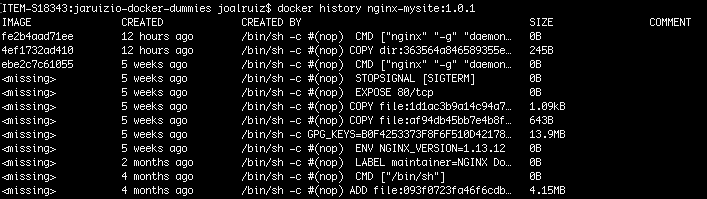
In the picture, we can show that the command executed in order to stay Nginx in the foreground is duplicated and it’s creating a new layer.
What is the size of an image?
You’re wondering why when you execute docker images -a all the images listed have the same size.
The column “size” is the cumulative space taken up by the image and all its parent images.
In our example, the size is 18MB because they are sharing the main layer (nginx:alpine), but it’s important to know that each command in the Dockerfile adds a layer in the final image. If you declare a command to delete anything, maybe the size will not decrease as you expect because a new layer will be created and added to the final image.
There is an interesting command to check the real space used in disk: docker system df -v:
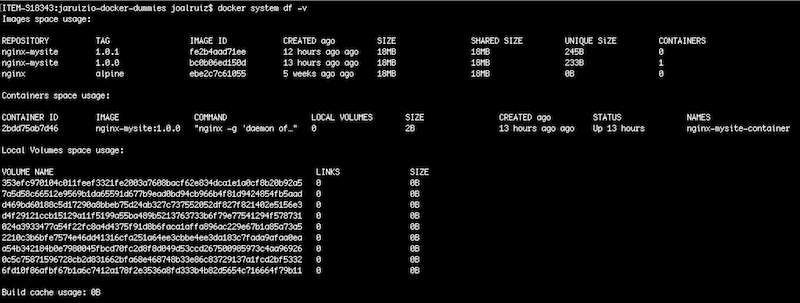
This command shows the shared space and the unique space of each image. That means that the three images ara sharing 18MB because there is a image on top of the hierarchy (nginx:alpine).
Publishing
At the beginning of the post we talked about Docker Hub and we created our first repository but the repository was empty. Now, we’re going to publish our images (nginx-mysite).
The first step is tagging the image to be pushed. To do that, we have to use the command docker tag <source image> <target image> where
- source image: is our “local image” (nginx-mysite)
- target image: is the tag of the image in the registry (in our case, Docker Hub).
Let’s go:

We check that we have a new image. Let’s publish in Docker Hub executing docker pull <image>:
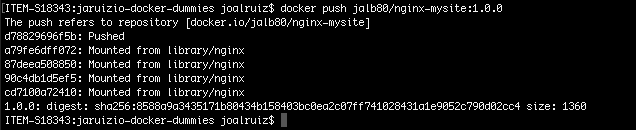
If we check in Docker Hub, we’ll see our image and tag:
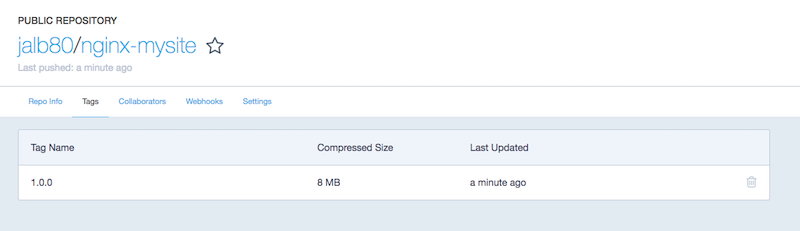
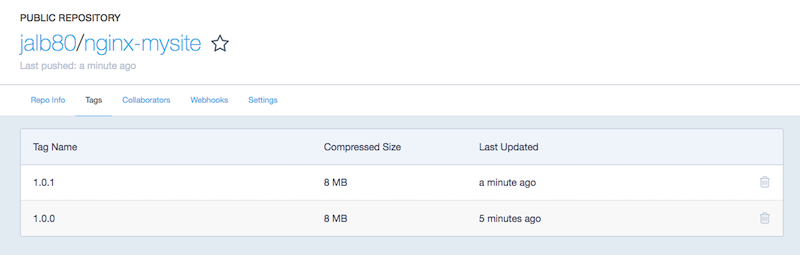
We can push the other version doing the same steps: tag and push:
And in Docker Hub:
If you want to test the whole cycle, you can remove all the images executing docker rmi $(docker images -q) --force and then pull both images executing
docker pull jalb80/nginx-mysite:1.0.0 and docker pull jalb80/nginx-mysite:1.0.1 from Docker Hub to check if everything works. If you do that and execute
docker images -a, you are going to see just two versions (1.0.0 and 1.0.1) of the image jalb80/nginx-mysite. You’re not going already to see the image of
Nginx because you pulled your own image. You could build new images taking your image as a base.
To check if everythis works as we expect, we’re going to generate a container from each image:
- version 1.0.0: execute
docker run --name nginx-mysite-container-1_0_0 -d -p 8080:80 jalb80/nginx-mysite:1.0.0 - version 1.0.1: execute
docker run --name nginx-mysite-container-1_0_1 -d -p 8081:80 jalb80/nginx-mysite:1.0.1
Then, open your browser and check http://localhost:8080 and http://localhost:8081
Summarizing
In this post, you’ve learnt:
- Docker Hub and registry concept
- Dockerfile concept
- Images and layers
- Basics commands:
- Get an image:
docker pull <image> - List all images:
docker images -a - Build an image from Dockerfile:
docker build -t <tag> <path to Dockerfile> - Get the history of an image:
docker history <image> - Get details about space using by Docker:
docker system df -v - Tag an image:
docker tag <source> <target> - Push an image:
docker push <image:version> - Remove all images:
docker rmi $(docker images -q) --force
- Get an image:
I hope you’ve liked this post. In next posts we’ll talk more in detail about Dockerfiles.
)