If you are new in this kind of frameworks “SPA oriented” or you’re used to build server-side applications, you have to keep in mind that a navigation action doesn’t have to be a request to the server. Actually, in a SPA, it isn’t.
In this post I would like to talk about the routing in Angular 2. The idea is to write several posts about this topic, from the basic aspects to the advanced ones.
What does “routing” means in the client-side?
In a non SPA application (like a JSP application), the navigation is performed by sending a request to the server in order that this one responds with the HTML of the new page. This produces a complete reload of the application in the browser.
In a SPA, the main page (known as “shell”) is loaded initially from the server. This shell contains everything the application need to start working (libraries, main application files,…etc) and after that, depending on the calls to the API or the user action, some views will shown or hidden without any server interaction. In a SPA, the common behaviour is calling to the server to get data. If the application implements any lazy loading method, when the application needs a new javascript file (for instance a javascript of a module) call to the server to get the file and then, the file is catched.
Frameworks like Angular need something to perform navigation in the client-side, without sending a navigation action to the server. It’s important that each navigation produces a change in the URL because, for instance, maybe the user wants to add it to his bookmarks. Have you ever thought about an application that all the pages have the same URL? How will you save subsections in your bookmarks?
Routing in Angular
Navigation service
Angular doesn’t provide a navigation service directly in its core. The navigation service is an additional module that it’s necessary to import in our project.
import { RouterModule, Routes } from '@angular/router';
We are importing two elements:
- Routes: This is a Type representing an array of elements Route. Route is an interface that declares all the properties that a route can have. Later on, in this and future posts, we will see these properties and their uses.
- RouterModule: adds directives and providers.
Basically, the Route object is in charge of “listening” the target URL to show the view associated to a component (in Angular, each view is associated to a component).
Navigation map
The next step is to define the navigation map. In our example, we’re going to have this navigation map:
URLs:
- Home = /
- Feature1 = /feature1
- Feature2 = /feature2
- Feature3 = /feature3
- Feature31 = feature3/feature31
- Feature32 = feature3/feature32
- Feature33 = feature3/feature33
We’re going to create a new file, app.routing.ts and putting the routes there. Each route has associated a component:
...
const routes: Routes = [
  { path: '', component: HomeComponent },
  { path: 'feature1', component: Feature1Component },
  { path: 'feature2', component: Feature2Component },
  { path: 'feature3', component: Feature3Component,
    children: [
      { path: 'feature31', component: Feature31Component},
      { path: 'feature32', component: Feature32Component},
      { path: 'feature33', component: Feature33Component}
    ]
  }
];
...
When the browser “navigates” to a path defined in this map, the route service will show the view linked to the component.
In Angular we have to keep in mind that the Router has a “first-match” strategy so, when it finds the first path that matches with the path requested, it shows the view linked to the component and finish its job.
Location strategy
We have to keep in mind that we want our application to navigate to several pages/views without a server call, modifying the URL and managing browser’s history.
If our browser supports HTML5, the Route object will use the methods pushState() and replaceState() to manage the browser’s history object and perform the navigation. This methods don’t execute any server call.
If our browser doesn’t support HTML5, every change in the URL will produce a server call if the target URL doesn’t contain “#”. So, in this kind of browsers (old browsers), it’s necessary to build the application URLs using the character “#”.
The Angular Route object covers these two kinds of navigation strategies:
- PathLocationStrategy: this the default, using HTML5 pushState and replaceState.
- HashLocationStrategy: this is the strategy for old browsers, using the hash character (#) in the URL.
How do we configure the location strategy in Angular?
The location strategy is configured by a provider. We have to add the LocationStrategy and configure it to use the right class according to the strategy that we’ve chosen. Angular offers two class that extend the LocationStrategy class:
These ones are not part of Angular core. They are located in the Common module. So to configure our app to use a strategy, we have to add a provider and specify the class that implements the strategy. In this case, we add it in app.module.ts file:
...

providers: [{provide: LocationStrategy, useClass: HashLocationStrategy}]

...
We are going to select HashLocationStrategy to start the example and then, we’ll change the strategy and we’ll see the impact. The strategy by default is PathLocationStrategy. If we are going to use this strategy we don’t have to anything to configure it
Outlets
Our application needs a place where views associated to components are going to be shown when a navigation action is performed. Remember that every “path” defined in the navigation map has associated a component.
Angular defines a directive called RouterOutlet. This directive is used to display views for a given path.
The easiest way is just using the tag, without declaring anything, that is without specifying the target outlet in the navigation map, you don’t have to specify the name in the outlet directive and you don’t have to specify the target outlet in the navigation action.
- Navigation map
...
const routes: Routes = [
  { path: '', component: HomeComponent },
  { path: 'feature1', component: Feature1Component},
  { path: 'feature2', component: Feature2Component},
  { path: 'feature3', component: Feature3Component,
    children: [
    ]
  }
];

export const routing = RouterModule.forRoot(routes);
- Outlet directive (for instance in app.component.ts):
...
<h1></h1>
<router-outlet></router-outlet>
...
This is independent of the outer layout, that is, the view will be rendered in the space of the component where the tag is placed. In this case, we have placed the tag inside the main view of our application but in other cases, the tag can be placed in a secondary component. For instance, our component associated to the “feature3” includes a subnavigation in its view and adds the
<h2>This is the feature 3</h2>
<nav style="border: 2px solid black; padding: 1rem; background-color: lightgreen">
  <a [routerLink]="['./feature31']">Feature 3-1</a>
  <a [routerLink]="['./feature32']">Feature 3-2</a>
  <a [routerLink]="['./feature33', 'feature3']">Feature 3-3</a>
</nav>
<router-outlet></router-outlet>
- Navigation action (for instance in app.component.ts):
<nav style="border: 2px solid black; padding: 1rem; background-color: lightgrey">
  <a [routerLink]="['/']">Home</a>
  <a [routerLink]="['/feature1']">Feature1</a>
  <a [routerLink]="['/feature2']">Feature2</a>
  <a [routerLink]="['/feature3']">Feature3</a>
</nav>
In following posts will see the way of defining several outlets and how to use them but for the moment, let’s following with the next concepts.
Static navigation
The easy way consists on a simple tag with the routerLink directive associated. For instance, we add a navigation bar in the main page of our application:
<nav style="border: 2px solid black; padding: 1rem; background-color: lightgrey">
  <a routerLink="['/']">Home</a>
  <a routerLink="['/feature1']">Feature1</a>
  <a routerLink="['/feature2']">Feature2</a>
  <a routerLink="['/feature3']">Feature3</a>
</nav>
Dynamic Navigation
Static navigation is good but we usually have to perform navigation actions depending on business logic and we can not use just anchor tags. A easy way to do this is using the method navigate of Router class. Programatically we select the target path and it allows to pass some params or for instance, take a relative or absolute path.
This is an example:
   ...
   export class Feature32Component {
      ...
      ...
      moreDetail() {
          // Simple navigation
          this._router.navigate(['/feature3/feature33']);
      }
      ...
      ...
   }
   ...
You can check the official documentation to know more detail of the params of the navigate method.
What about params?
We’ve seen how to navigate but many times passing some params is necessary. In Angular, we need to declare the params that the target path expects. The way to declare them is by using “/:param”. For instance:
{ path: 'feature33/:origin', component: Feature33Component}
Sending params And the ways to navigate passing params are the followings:
- Static navigation
... <a [routerLink]="['./feature33', 'feature3']">Feature 3-3</a> ... - Dynamic navigation
...
goDirectlyTo33() {
  this._router.navigate(['/feature3/feature33','feature1']);
}
...
Getting params
To get this data we have to use ActivatedRoute. Its official definition says:
Contains the information about a route associated with a component loaded in an outlet
If we want to get the params sent, we have to get the current value of the route. To do that, we have to access to the snapshot property, typed by ActivatedRouteSnapshot. This interface provides several properties to work with the activated route. In this case, we need to access to the “params” property. In our example, we’re getting the “origin” param:
...
export class Feature33Component {

  origin:string;

  constructor(private _route: ActivatedRoute, private _router: Router) {
    this.origin = this._route.snapshot.params['origin'];
  }
}
...
There is other way to get the params. This way consists on use directly the “params” property of ActivatedRoute. This property is an Observable. In others posts we’ll talk deeper about Observables. In this post, we are just going to show how we can access to the path params using the property “_params”. For instance, you can check “feature2.component.ts”:
...
this._route.params.subscribe(params => {
   if (params['param1']) {
     this.param1 = params['param1'];
     this.showparam = true;
   }
 });
...
Maybe you are wondering that how is it possible to define that a param in a route is optional? The key is that if we consider that a param is optional, we really have two different paths:
- “/path”
- “/path/param”.
This means that we have to define both paths in our navigation map and it’s important that the path without param is placed before the path with the param because Route evaluates paths in order.
We must to distinguish between path params and query params. Path params are really belong to the path and defining different routes in the application.
Query params
Passing optional parameters or query params is usually done in web applications. Angular defines some extra options for navigation. You can check this options in the NavigationExtras interface.
An extra is query params. For instance, we can define an object of type NavigationExtras and set some query params:
let navigationExtras:NavigationExtras = {
   queryParams: {
     qParam1: 1,
     test2: 'test'
   }
};

this._router.navigate([target], navigationExtras);
We can also use them in a static navigation using anchor:
...
<a [routerLink]="['/feature2','value1']" [queryParams]="{qParamRLink: 'test'}">Feature2</a>
...
The way to get them is similar to route params. We can use the “snapshot” property or directly, the “queryParams” property (Observable) of ActivatedRoute. For instance, we’re going to use the second one:
  constructor(private _route: ActivatedRoute) {
    ...

    this._route.queryParams.subscribe(params => {
      this.queryParams = JSON.stringify(params);
    });

    ...
  }
Static data
Angular offers the capability to associate some data to a path at the time of route configuration. This is the property “data” of the Route interface. This property can be associated to an object, array, etc… For instance:
....
....

const routes: Routes = [
  { path: '', component: HomeComponent, data: [{appName: 'Angular Routing'}, {version: '1.0.0'}] },

  ....
  ....
Getting the static data is similar to getting the params but in this case we have to access to the property “data” of ActivatedRouteSnapshot:
...
export class HomeComponent {

  staticData:Object;

  constructor(route: ActivatedRoute) {
    this.staticData = route.snapshot.data;
  }
}
...
Handling “Page not Found (404)”
We can define a component to handle not defined paths in our application, that is, named typically by “Page Not Found” (404).
As we’ve said before, the order or the routes is so important when we define the navigation map of the application because the router uses a “first-match wins” strategy to get a route. This means that when the router finds a path matching to the target URL launch the component associated. If the router doesn’t find a match, throws an error.
The router provides a wildcard configuration so it’s possible to associate the path “**" to a component. If no route matches the current target requested, it’ll match the wildcard.
In our application, we add this feature at the end of the routes:
const routes: Routes = [
  { path: '', component: HomeComponent, data: {appName: 'Angular Routing', appVersion: '1.0.0'}},
  { path: 'feature1', component: Feature1Component},
  { path: 'feature2', component: Feature2Component},
  { path: 'feature2/:param1', component: Feature2Component},
  { path: 'feature3', component: Feature3Component,
    children: [
      { path: 'feature31', component: Feature31Component},
      { path: 'feature32', component: Feature32Component},
      { path: 'feature33/:origin', component: Feature33Component}
    ]
  },
  { path: '**', component: PageNotFoundComponent}
];
So when the routes can’t find a match, it’ll launch the view associated to “PageNotFoundComponent”
Hands-on: putting it all together
This the moment when we can execute the whole application to check how the navigation is working.
Example code
The code is uploaded in github.
To launch the project you have to execute this command:
ng serve
(you need to have installed angular-cli.
Angular will build and package the application but it’ll not open our browser…so you have to open the browser and write the following URL: http://localhost:4200
Navigation
The first view of the application is the following:
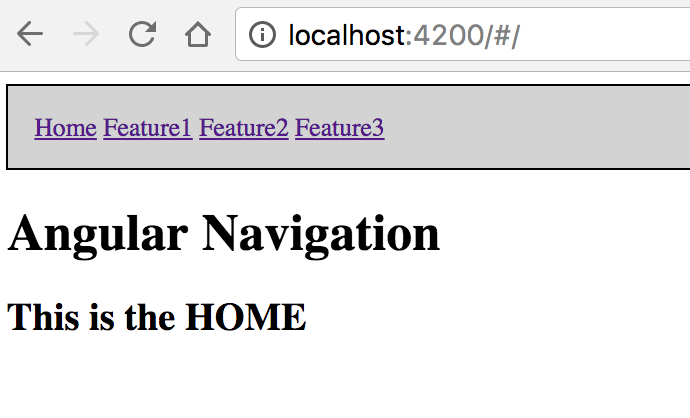
As you can see in the address bar, the URL contains the symbol ‘#’. This is because we’ve choose the Hash Strategy.
If we click on the “Feature 1” link, for instance, the application goes to this route and shows the template associated to the Feature1Component:
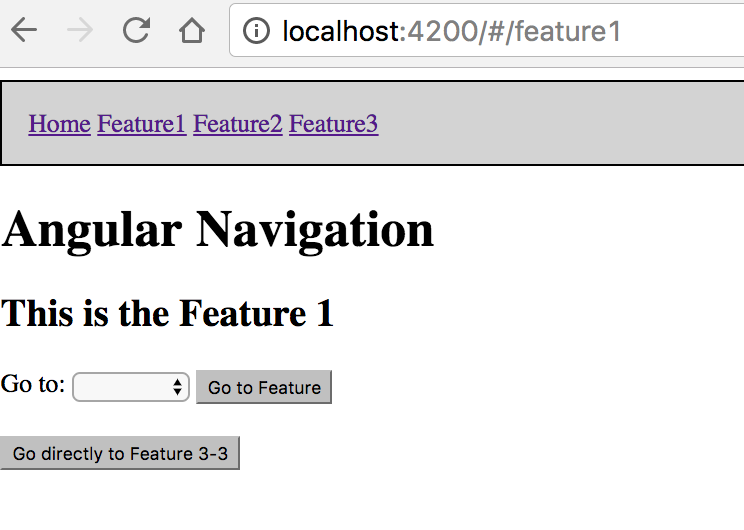
This navigation has been the static one, by using the routerLink directive. In the current view you can see a HTML select with two options and also you can see a button for navigating directly to 3-3.
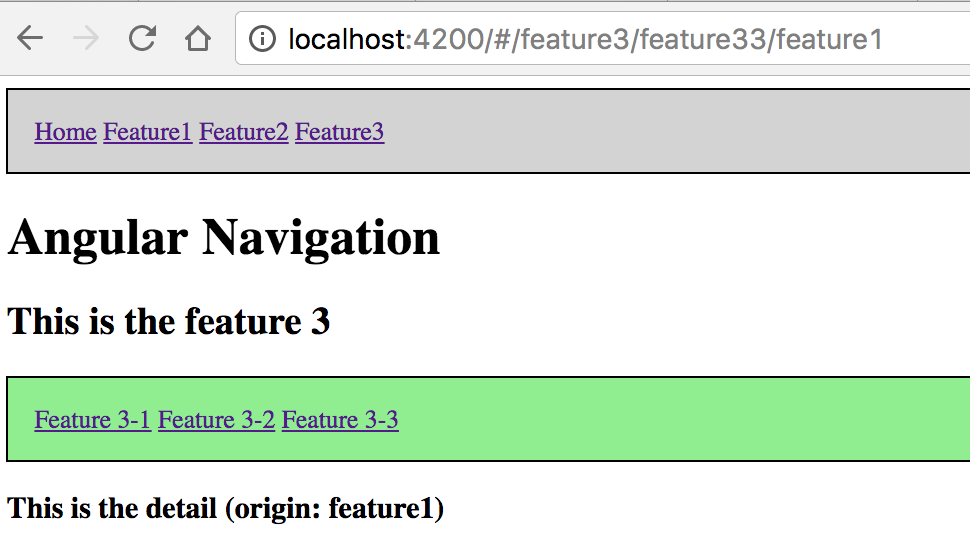
If you click on whatever button, you’ll perform a dynamic navigation. For instance, we are going to click on the second button. The application will show the template associated to Feature33Component:
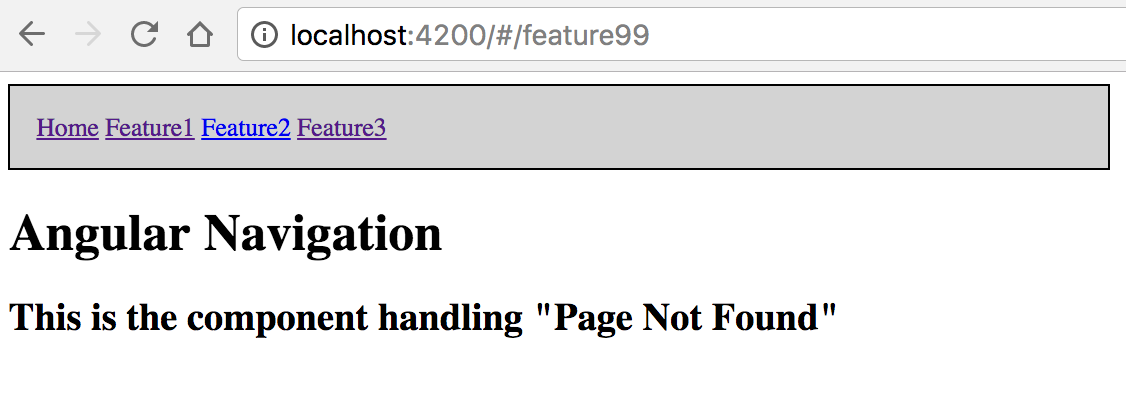
If we type a non existent URL, the route will show the view associated to “PageNotFoundComponent”: